Capturing screenshots on a Mac is an essential skill for students, professionals, content creators, and everyday users. Whether we want to save an important message, document a technical issue, or create visual instructions, macOS offers multiple powerful screenshot tools. In this comprehensive guide, we cover every method, explain how to screenshot on Mac using shortcuts, advanced settings, and built-in utilities, and show how to annotate, save, and organize each capture efficiently.
Below are helpful illustrations demonstrating where each shortcut appears on your Mac screen.
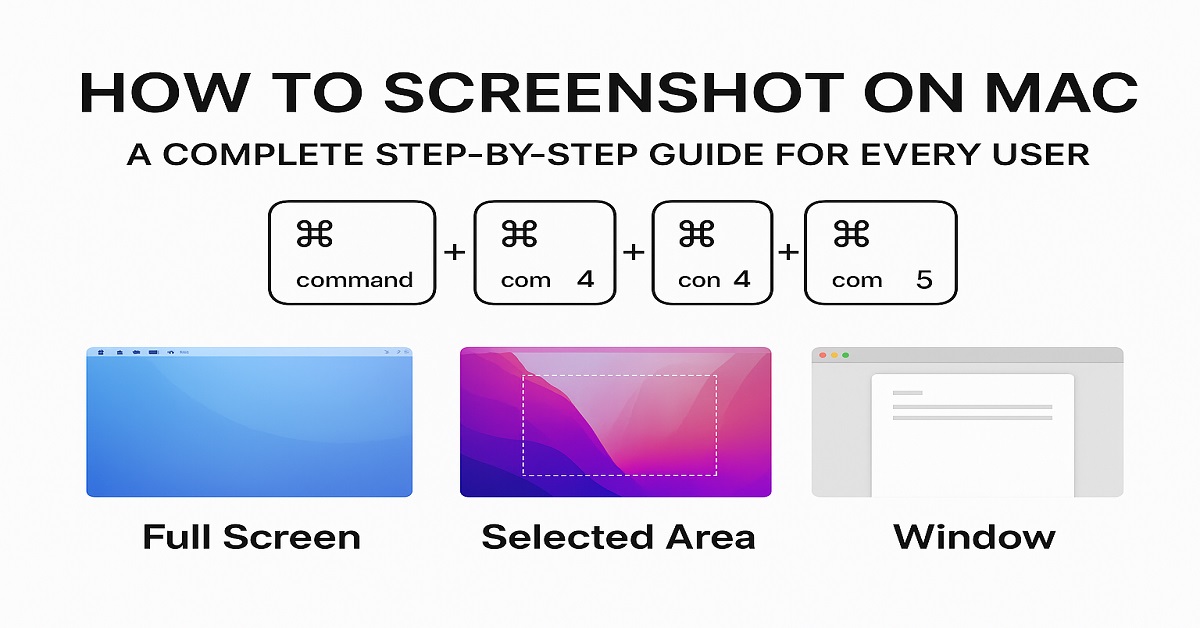
Understanding the Mac Screenshot Controls
macOS provides three main keyboard shortcuts that cover nearly all screenshot needs. Each shortcut is designed for speed and convenience, allowing us to capture exactly what we see on the screen.
Why Mastering Screenshot Shortcuts Matters
Using built-in commands ensures:
- Quick captures without opening apps
- Better productivity during daily tasks
- Accurate communication, especially when reporting errors or creating tutorials
- Clean, high-resolution images saved instantly
1. How to Screenshot the Entire Screen on Mac
The easiest screenshot method captures everything visible on your display.
Shortcut: Press Shift + Command + 3
This command instantly saves a PNG file to your desktop by default.
Steps:
- Navigate to the screen you want to capture.
- Press Shift + Command + 3.
- A thumbnail may appear at the screen’s bottom-right corner.
- Let it auto-save or click the thumbnail for quick editing.
Best for:
- Capturing full webpages
- Recording online meetings or presentations
- Saving full-screen applications or dashboards
2. How to Capture a Selected Portion of the Screen
If we want to screenshot only a small area, macOS makes cropping effortless.
Shortcut: Press Shift + Command + 4
When activated, the cursor transforms into a crosshair for selecting any area.
Steps:
- Press Shift + Command + 4.
- Drag the crosshair to highlight the desired region.
- Release the trackpad or mouse to capture.
- View or edit using the floating thumbnail.
Best for:
- Snippets from documents
- Cropping specific app windows
- Capturing partial web content
3. How to Screenshot a Specific Window on Mac
When we need clean, focused captures, macOS allows selecting a window precisely.
Shortcut: Press Shift + Command + 4, then Tap Spacebar
This changes the cursor to a camera icon.
Steps:
- Press Shift + Command + 4.
- Hit the Spacebar.
- Move the camera cursor over the window you want to capture.
- Click once to save the image.
4. How to Use the Screenshot Toolbar (Advanced Options)
macOS includes a built-in screenshot interface offering extra tools such as timers, screen recording, custom save locations, and more.
Shortcut: Press Shift + Command + 5
This opens the Screenshot Toolbar, giving tools for:
- Capturing entire screen
- Capturing a selected window
- Capturing a specific selection
- Recording entire screen
- Recording a selected portion
- Setting timers (5–10 seconds)
- Choosing file save location
Why Use It?
The toolbar is perfect for users who want more control—especially for tutorials, presentations, or content creation.
5. How to Screenshot the Touch Bar (For MacBook Pro Models)
If we are using an older MacBook Pro with a Touch Bar, macOS lets us screenshot it as well.
Shortcut: Press Shift + Command + 6
This captures a high-resolution screenshot of the entire Touch Bar.
6. How to Edit, Crop & Annotate Screenshots on Mac
Editing is built directly into macOS through the Markup tool.
How to Open Editing Tools:
- Click the screenshot thumbnail immediately after capturing.
- Choose from tools for:
- Cropping
- Drawing
- Highlighting
- Adding signatures
- Inserting shapes or text
Alternatively, open the screenshot in Preview and select Markup.
7. Changing Where Mac Screenshots Are Saved
By default, screenshots save to the desktop, but macOS allows choosing custom folders for better organization.
How to Change Save Location:
- Press Shift + Command + 5.
- Select Options.
- Choose from:
- Desktop
- Documents
- Clipboard
- Messages
- Preview
- Custom Folder
Tip: Create a dedicated folder like /Screenshots for easy sorting and archiving.
8. How to Copy Screenshots to Clipboard Instead of Saving Them
If we want to paste screenshots directly into apps like Word, Photoshop, Gmail, or Notes, Mac shortcuts allow copying without saving as a file.
Use Control with any screenshot shortcut
Examples:
- Entire screen: Control + Shift + Command + 3
- Selected portion: Control + Shift + Command + 4
- Window: Control + Shift + Command + 4, then Spacebar
Paste instantly using Command + V.
9. How to Take Scrolling Screenshots on Mac
macOS does not support scrolling screenshots natively, but we can use apps that allow it.
Best apps for scrolling captures:
- CleanShot X
- Snagit
- Monosnap
These tools let us capture entire webpages, long documents, or chat threads beyond what fits on the screen.
10. How to Find Your Screenshots Easily
All screenshots typically save with a filename like:
Screen Shot YYYY-MM-DD at HH.MM.SS.png
To locate them:
- Open Finder → Type “screenshot” in the search bar.
- Or check Recents for the latest captures.
11. How to Enable or Disable Screenshot Thumbnails
The floating thumbnail preview can be useful—or distracting.
To disable it:
- Press Shift + Command + 5.
- Choose Options.
- Uncheck Show Floating Thumbnail.
12. How to Change Screenshot File Format (PNG, JPG, PDF, GIF)
macOS defaults to PNG, but other formats may be preferred for smaller file size.
Change via Terminal:
defaults write com.apple.screencapture type jpg; killall SystemUIServer
Replace jpg with png, pdf, gif, or tiff as needed.
13. How to Use Preview to Capture Screenshots
Preview offers alternative capture options:
- Open Preview.
- Click File → Take Screenshot.
- Choose:
- From Selection
- From Window
- From Entire Screen
14. Screenshot Not Working on Mac? Here’s What to Do
If shortcuts stop working:
Check keyboard settings:
- Go to System Settings → Keyboard.
- Ensure shortcuts are enabled under Keyboard Shortcuts → Screenshots.
Restart the Mac:
Temporary bugs often resolve after reboot.
Update macOS:
Outdated systems may cause shortcut issues.
Conclusion: Master Your Mac Screenshot Skills
Learning how to screenshot on Mac quickly and efficiently helps us communicate better, save important information, and create professional-quality content. With multiple shortcuts, built-in editing tools, and advanced options, macOS offers one of the most versatile screenshot systems available.
Whether we need to capture a full screen, specific region, app window, or even record the display, this guide equips us with everything necessary to capture the perfect screenshot every time.